News
Embroider Better: 4 Tips For Top Stitching Results
There’s nothing quite like settling into a sunny afternoon with an embroidery hoop in your lap, a handful of colorful threads, and a pattern you’re excited to bring to life.
Whether you’re stitching in your cozy craft corner at home or enjoying the rhythm of needle and thread while on a road trip, embroidery is a comforting, creative practice that allows your hands and heart to work in harmony.
And while every stitch you make tells a story, there are some tips and techniques that can help your finished pieces turn out cleaner, more professional, and more satisfying.
In this guide, we’re going to dive deep into four powerful tips for improving your embroidery projects—especially hoop art.
These techniques will elevate your stitching and help you feel more confident in your craft, whether you’re a beginner still figuring out satin stitches or a seasoned embroiderer looking to sharpen your results.

Tip 1: Fill First, Then Outline
One of the most important techniques in embroidery, particularly for designs with both filled and outlined sections, is to fill before you outline.
This principle can make a dramatic difference in the neatness and clarity of your finished piece.
When you’re working on designs like mountain silhouettes or patterned tea cups, the inner details should be stitched first.
For instance, in a hoop design like Mountain Time, where the peaks are filled with various stitch styles (zigzags, grids, satin stitches), it’s best to do all that internal work first.
Only after the details are securely in place should you go in with the outline stitches.
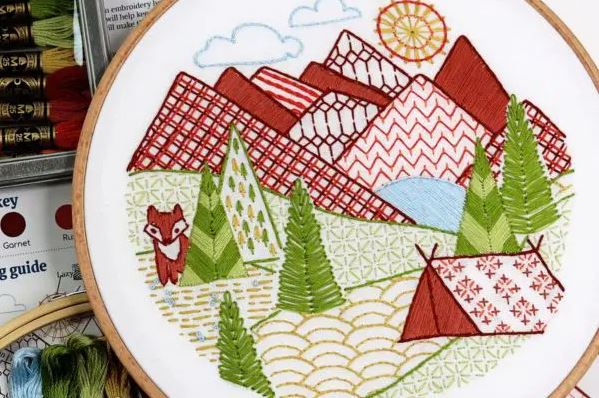
Why this matters:
- Prevents Overlapping: Filling first keeps you from accidentally stitching over your outline, which can make lines look uneven or frayed.
- Maintains Edge Clarity: Outlining last sharpens the design and gives each section a polished, finished look.
- Cleaner Stitching: It’s easier to anchor your stitches into a stable base of fill stitching, avoiding pulled or distorted outlines.
That said, there are always exceptions. Sometimes, you want the fill to “spill out” for a soft or fuzzy effect.
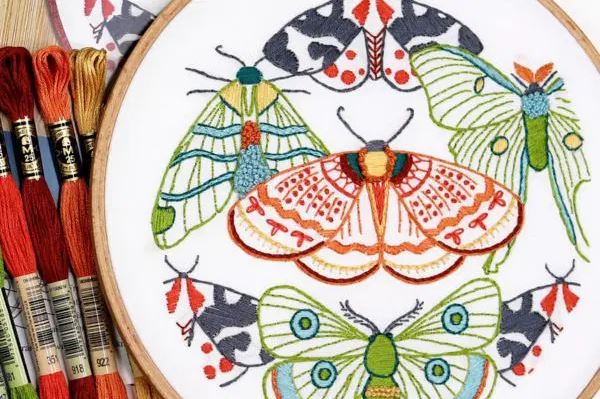
A great example is the gold French Knots on the thorax of a green moth in a natural motif. These knots are stitched after the outline to deliberately extend beyond the form, creating a tactile, fluffy texture.
Use your artistic judgment—just know the rules before you break them.
Tip 2: Plan Ahead with Overlapping Elements
If your design features overlapping elements—like flower petals, feathers, or decorative circles—you’ll get the best result by carefully planning your stitching order.
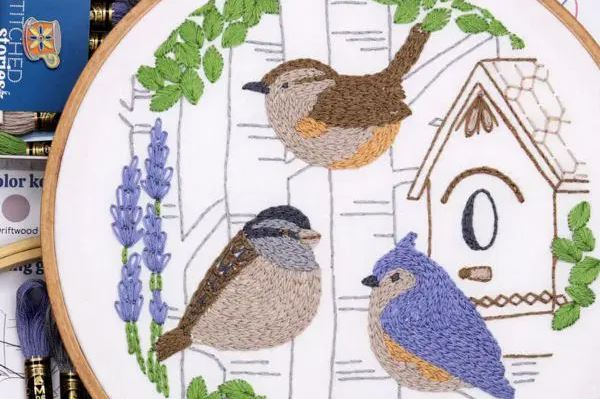
Let’s take the Small Birds pattern as an example. The lupin flowers included in the design have overlapping petals.
To mimic the way real flowers grow, you would start stitching from the top petal downward, so that the upper petals sit behind the lower ones.
This method creates a natural sense of depth and realism.
In another piece, such as Tree of Life, it’s helpful to embroider the base tree structure first. This includes the trunk and main branches.
Once that’s completed, you can overlay the birds, leaves, and circles on top, knowing they’ll look well-integrated rather than oddly floating.
Layered Embroidery Projects:
- Flowers: Always start with background petals and layer forward.
- Feathers: Begin at the back and work toward the front for dimension.
- Geometric Designs: If you have layered circles or grids, follow the intended stacking order. For example, you might have a base layer of turquoise grid stitches, covered by diagonal dark green stitches, topped with anchor points in pale green. This builds visual complexity and a professional finish.
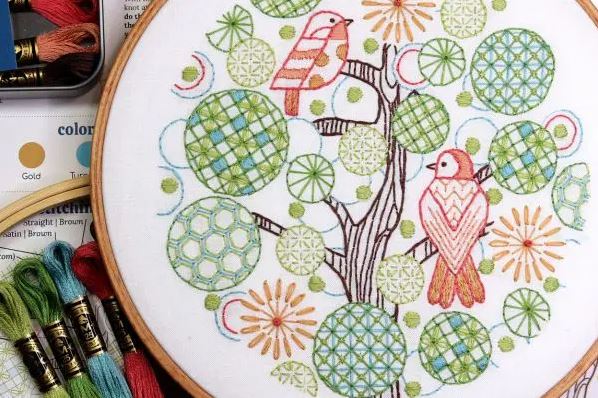
A little planning goes a long way. Sketch out your stitch sequence or note it in your pattern guide so you won’t be left reworking sections because of improper layering.
Tip 3: For Satin Stitching, Choose the Shortest Diagonal
Satin stitch is a go-to for filling large shapes with smooth, shiny thread—but it can also be tricky.
One of the best ways to keep your satin stitching looking clean and tension-balanced is to choose the shortest diagonal stitch path within a shape.
Take the globe motif from the School Days design. The continents on the globe are filled using satin stitches placed on a diagonal—but not just any diagonal.
Rather than stitching straight horizontally or vertically (which could make wobbly lines stand out), a diagonal was chosen that offers the shortest and most stable stitch length.
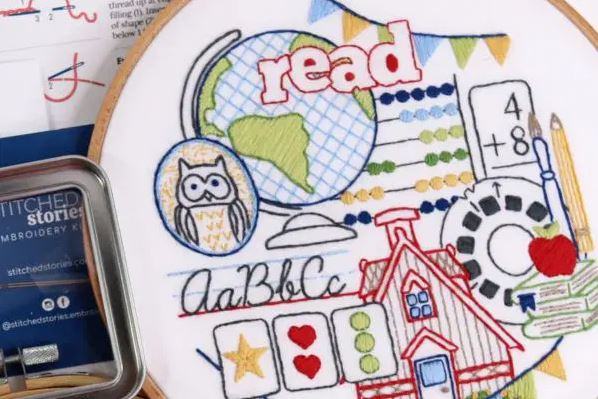
What to consider:
- Avoid long straight lines: They’re harder to control, more prone to snagging, and tend to loosen over time.
- Diagonal = stability: Your eye will interpret the stitch as intentional, not accidentally slanted.
- Plan your direction: Before stitching, hold your thread taut across the area and observe the angle that gives you the shortest run.
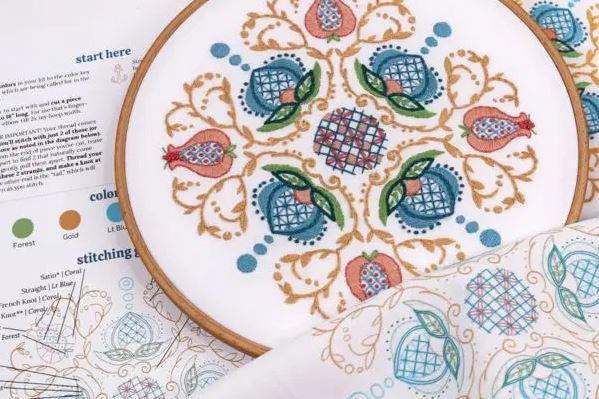
The same principle is used in detailed floral patterns like Jacobean flowers, which often repeat certain petal shapes.
To help you out, some designers lightly print suggested fill angles onto the fabric—a brilliant guide for stitchers learning how to manage shape and thread tension together.
Satin stitch can be your best friend when done right, but your angle of approach is everything.
Tip 4: Leverage Tension for Dynamic Stitch Effects
Tension is one of the most underappreciated tools in embroidery. It’s not just about keeping your thread tight—it’s about knowing when to tighten and when to loosen up. This can completely transform the character of a stitch.
Let’s look at a few examples:
Lazy Daisy
This classic petal stitch takes on very different moods depending on how tight your loop is.
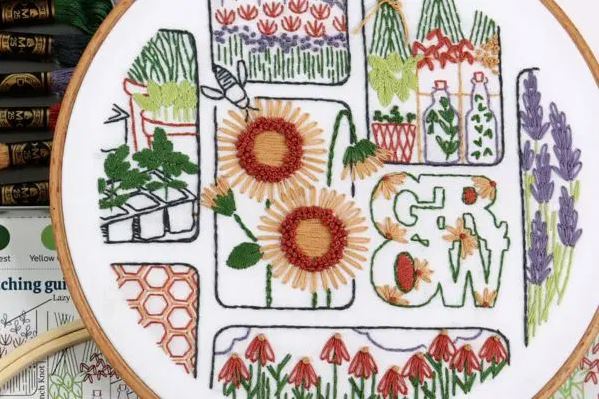
In the Grow pattern, sunflower petals are made with tight, precise Lazy Daisy stitches, creating crisp, controlled shapes.
In contrast, the purple lupin petals are made with looser Lazy Daisies, resulting in a fluffier, more organic feel.
French Knots
Everyone loves a good French Knot, but did you know you can vary their appearance by adjusting tension?
- Tight knots: Small, precise, great for detail work like grape bunches or tiny flower centers.
- Loose knots: Chunky, textured, and full—great for the center of sunflowers or fuzzy animal textures.
Fly Stitch
This stitch is all about variation. In Harvest Table, the turkey feathers and neck use Fly Stitches in multiple ways:
- Tight with long anchors: Creates precise Y shapes (like in the turkey body outline).
- Looser with short anchors: Makes flowing U shapes, perfect for layered areas like the turkey’s neck.
- Loose scallops: Adds softness to decorative sections inside the feathers.
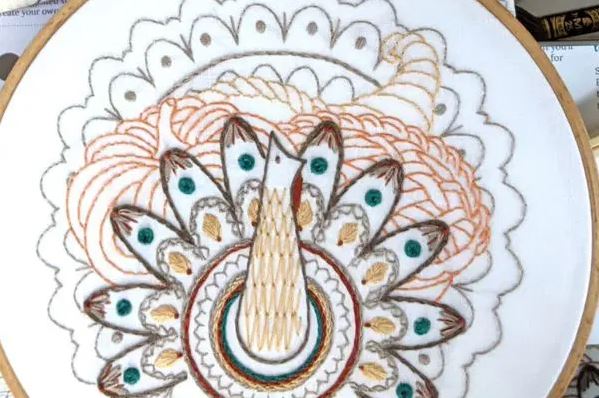
Experimenting with tension gives you greater expressive control in your embroidery.
Don’t feel locked into one “correct” way to do a stitch—learn what your threads can do.
Bonus Insight: Stitching Mindfully During the Seasons
Summer stitching has a special vibe—sunlight spilling across your table, iced tea nearby, the satisfaction of making something by hand.
But no matter the season, embroidery is a practice that brings joy, calm, and connection.
Here’s how to make the most of your time with the needle:
- Slow Down: There’s no rush. Let embroidery be a break from fast-paced routines.
- Work in Layers: Tackle one section at a time to prevent overwhelm.
- Listen to Your Threads: Feel when tension is right or off. Good embroidery is all about subtle adjustments.
- Celebrate Mistakes: Every error is a learning moment. Stitch over it, embrace it, or turn it into something new.
Final Thoughts: Elevate Your Hoop Art, One Stitch at a Time
Embroidery is a skill that grows with every project you take on.
Whether you’re embroidering delicate moths, whimsical tea cups, blooming flowers, or vibrant birds, the techniques you use shape the final piece.
By focusing on fill-before-outline methods, planning your layers, choosing optimal angles for satin stitch, and mastering stitch tension, you can take your embroidery from good to great.
And most of all?
Enjoy the journey. Each piece you stitch becomes part of your story—a creative legacy woven thread by thread.
So pick up your hoop, thread your favorite needle, and start stitching better today. You’ll be amazed at the results.

